
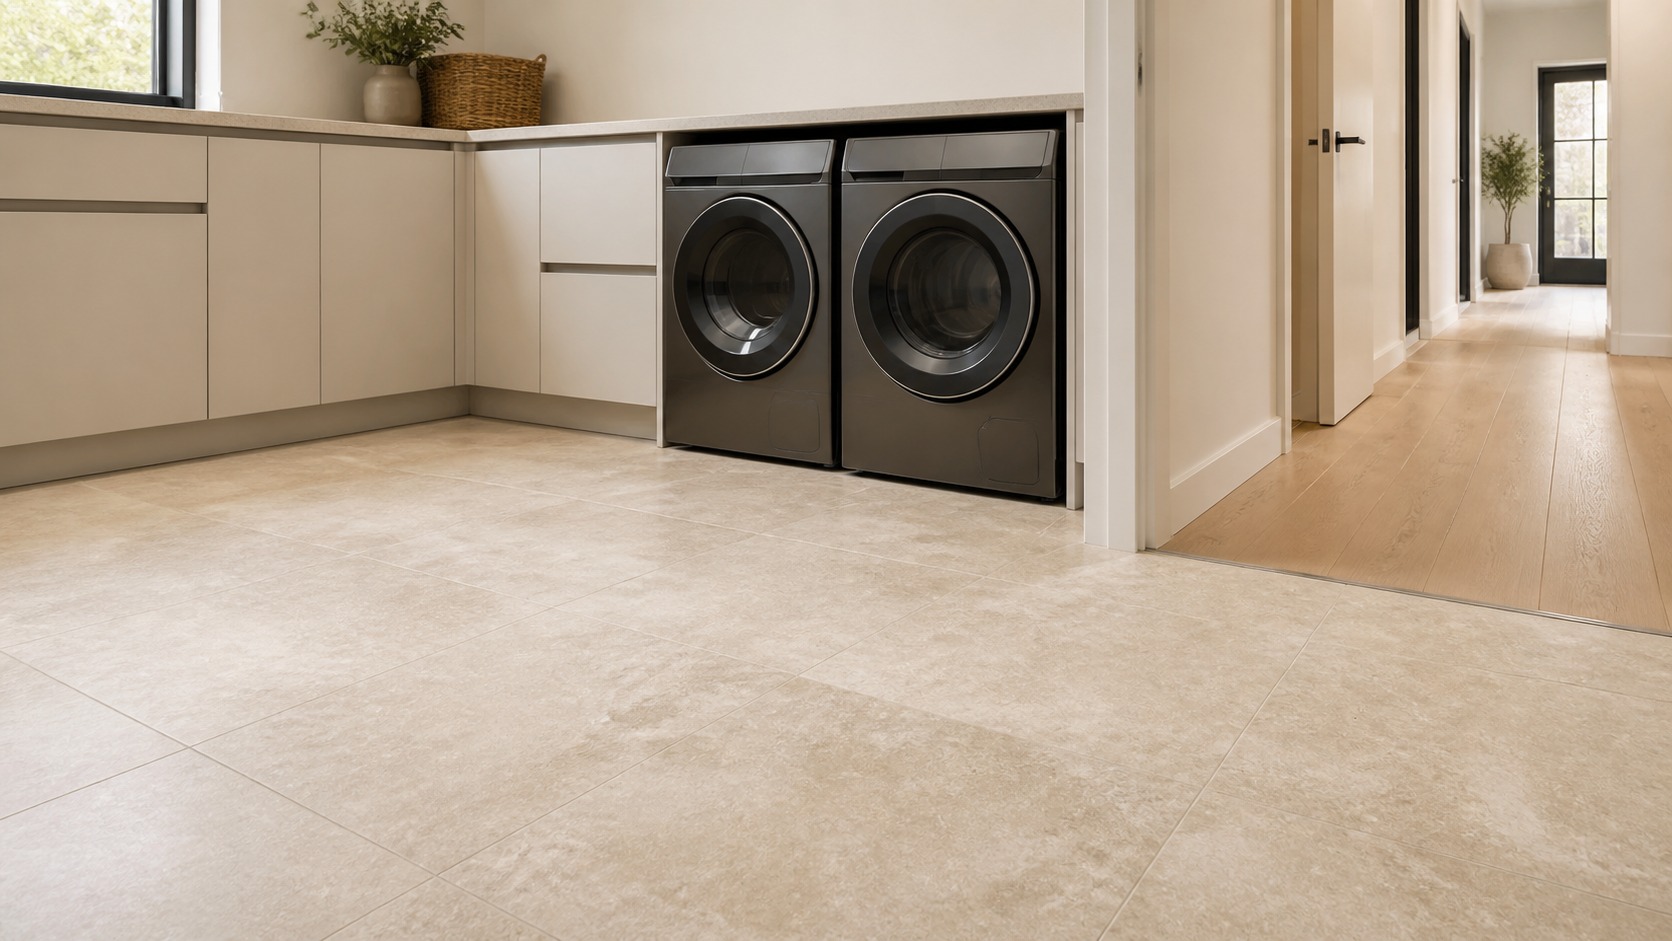
Laundry Flooring Must Perform When Water and Weight Arrive Together
A laundry room floor carries concentrated appliance loads, repeated vibration, rolling service movement, detergent drips, lint, wet baskets, and the possibility of a plumbing failure. Style matters because the floor occupies a broad visual plane and often connects to a hallway, mudroom, or kitchen, but appearance should be evaluated through those exposures. Porcelain tile, resilient sheet goods, luxury vinyl products, sealed concrete, and other materials can all suit particular conditions when the substrate, installation, transitions, and maintenance are correct. No surface is universally waterproof as an assembly simply because its top layer resists water. Seams, edges, penetrations, underlayment, drainage, and adjacent rooms determine how the system behaves. The best modern floor feels calm and continuous while remaining safe underfoot, stable beneath machines, accessible for service, and realistic to repair.
A: Durability depends on the complete system, exposure, substrate, installation, maintenance, and repair plan—not one material name.
A: The tile surface resists water, but joints, edges, penetrations, substrate, and drainage determine assembly performance.
A: Use the exact manufacturer's guidance for appliance loads, floating or adhered installation, and fixed cabinetry.
A: Very dark surfaces often show pale lint, while a varied midtone can balance appearance and inspection.
A: Continuity can enlarge the room, but the material must suit laundry exposure and transition detailing.
A: A related midtone often reduces visual contrast, though product performance and approved cleaning remain essential.
A: Yes when moisture, cracks, slope, finish, and maintenance are professionally assessed and addressed.
A: Use approved lifting, rolling, and temporary protection methods rather than dragging machines.
A: Requirements and feasibility vary; discuss drainage, pans, waterproofing, and local rules with qualified professionals.
A: Matching production color and pattern later can be difficult, especially after service or plumbing repairs.
Assess Water Risk Before Choosing Appearance
Identify supply connections, drains, sinks, exterior doors, and rooms below. Consider small recurring drips as well as a hose failure. Discuss pans, drains, waterproofing, shutoff devices, and leak detection with qualified professionals and applicable requirements.
Flooring is one layer of protection, not the complete plan. A water-resistant plank cannot direct a large leak safely, and grout does not make an unprepared substrate waterproof.
Check the Existing Subfloor and Structure
Tile requires suitable stiffness and flatness; resilient finishes reveal bumps and seams; concrete may contain cracks or moisture. Inspect and repair the substrate before installation. Uneven floors can prevent machines from leveling and concentrate vibration.
Account for finished height. Underlayment, membranes, mortar, and tile can create a threshold that catches baskets or complicates appliance removal. Coordinate door clearances and adjacent flooring early.
Where structural movement or damage exists, obtain appropriate professional evaluation rather than using the new floor to disguise it.
Consider Porcelain Tile for High Water Resistance
Porcelain tile offers durable surface performance, broad style choice, and compatibility with many wet-area strategies. Large formats reduce grout lines and create a quiet modern field, but demand a flat substrate and careful layout.
Design the Grout as Part of Maintenance
Grout color shapes the floor pattern and affects how lint and residue appear. A related midtone can soften joints and reduce contrast, while bright grout may require more visible upkeep. Select products suited to the installation and follow curing and cleaning guidance.
Plan joint width, movement accommodation, and edge cuts with the installer. Very narrow joints cannot correct irregular tile or substrate conditions. Keep spare tile and product information for repairs.
Evaluate Resilient Sheet Flooring for Fewer Seams
Sheet vinyl or other suitable resilient sheet products can provide a continuous, comfortable surface with relatively few joints. Product quality, seam placement, substrate preparation, indentation resistance, and edge detailing vary widely.
Heavy appliances can mark softer materials and complicate movement. Use manufacturer-approved protection during installation and service, and never drag machines across the finished surface.
Patterns range from quiet solid fields to convincing material looks. Choose scale from the room and avoid a printed repeat that becomes obvious across a long narrow floor.
Use Luxury Vinyl Products With Full-System Awareness
Luxury vinyl plank or tile can connect visually to adjacent living areas and offers warmer underfoot feel than ceramic. Verify the exact product for laundry-room use, standing water expectations, appliance loads, installation method, and substrate conditions.
Floating floors need perimeter movement and may react differently under fixed cabinetry or heavy appliances. Coordinate manufacturer instructions before deciding installation sequence. Water passing through joints can still affect the substrate.
Explore Sealed Concrete Where the Slab Supports It
Existing concrete can suit an industrial-modern room when cracks, moisture, slope, and finish are professionally assessed. Grinding, patching, staining, or sealing can create a durable plane without imitating another material.
Concrete is hard and can feel cold; mats must be selected for slip safety and drainage. Sealers have different sheen, chemical resistance, and maintenance cycles. Test appearance because repairs and aggregate variation remain visible.
Do not assume a coating solves moisture vapor or structural cracking. Diagnose underlying conditions before applying a decorative system.
Treat Natural Stone as a Maintenance Commitment
Stone provides unique depth but varies in porosity, strength, finish, stain sensitivity, and required sealing. Evaluate detergent and cleaner exposure with the supplier, and choose a slip-appropriate finish.
Thicker assemblies and heavy material may affect structure and transitions. Keep replacement pieces because exact natural variation cannot be recreated later.
Prioritize Slip Resistance Without Creating a Dirt Trap
A laundry floor may become wet near the sink or washer. Highly polished finishes can be risky, while aggressive texture may hold lint and residue. Compare tested slip properties, cleanability, and expected footwear.
Use compatible mats only where they lie flat, dry properly, and do not obstruct drains, doors, or appliance movement. A runner should not hide a developing leak.
Transitions need secure flush detailing to reduce trips. Consider users carrying baskets who cannot see the floor directly ahead.
Plan the Tile or Plank Layout From the Doorway
Set the dominant line in relation to the room shape, cabinets, and visible approach. Long planks can emphasize depth; large tile can calm a busy elevation. Avoid narrow slivers at exposed edges and awkward pattern shifts around machines.
Dry-layout representative pieces before installation. Variation in stone-look or wood-look products should be distributed intentionally so repeated graphics do not cluster.
Coordinate Flooring With Appliance Service
Ask the appliance installer and flooring professional to agree on protection before delivery. Temporary hardboard or another approved system should distribute wheel and foot loads without trapping grit beneath it. Identify lifting points and keep turning movements off vulnerable seams. A service call years later should follow the same plan rather than improvising with a towel or scrap of cardboard.
Where a drain pan is used, coordinate its lip with machine movement and floor cleaning. The pan must suit the equipment and site while remaining inspectable. Do not create a concealed edge that holds water under the machine or prevents the unit from sliding forward when a connection needs attention.
Machines must level securely and move forward when needed. Extend the finish continuously beneath them unless the flooring system or manufacturer requires another approach. Avoid ledges at cabinet openings that trap feet or rollers.
Protect floors during delivery with approved panels and lifting methods. Document how machines can be moved without scratching tile, tearing resilient surfaces, or separating floating joints.
Connect Adjacent Rooms Carefully
Continuing one floor can enlarge a small laundry area, but the material must suit the highest-risk room. A deliberate threshold may be more responsible than carrying vulnerable wood into a wet utility zone.
Match heights through substrate planning rather than relying on a bulky reducer. Where materials change, align the transition with the closed door or an architectural boundary.
Coordinate color undertones instead of seeking an imperfect imitation. Stone-look porcelain can complement adjacent oak without pretending to be the same material.
Choose Color and Pattern for Real Debris
Perfectly dark floors show pale lint; brilliant light floors reveal soil and detergent marks. Midtone variation often handles daily visual noise while remaining easy to inspect for leaks.
Small patterns can disguise debris but compete with cabinetry and baskets. Let one surface carry visual movement and keep the rest quieter.
Maintain the Floor as a System
Use cleaning methods approved for the finish, grout, sealer, and underlayment. Avoid products that leave a slippery film or damage joints. Inspect perimeter sealant, transitions, and areas beneath accessible appliance edges.
Address leaks immediately and investigate moisture that returns. Keep spare material, color information, batch numbers, and installation records. Repairability is part of durability.
A stylish laundry floor earns its appearance through sound preparation and practical detailing. When surface, substrate, water strategy, transitions, and service movement work together, the broad plane can remain quiet, safe, and durable through years of heavy use.
Compare Heated Floors With the Complete Assembly
Radiant floor warming can improve comfort in a cold basement or slab-on-grade room, but it introduces controls, sensor locations, compatible materials, installation sequencing, and repair considerations. Confirm the selected flooring, underlayment, adhesive, and heating system are approved together. Keep heating elements and sensors documented before they disappear beneath the finish. The system should not interfere with appliance leveling, drains, waterproofing, or service loads. Decide whether comfort justifies complexity in a room occupied intermittently, and use qualified design and installation rather than treating heat as a thin accessory layer.
Design Perimeters for Water and Cleaning
Baseboards and cabinet toe kicks meet the floor where lint, mop water, and small leaks collect. Choose moisture-tolerant details and seal transitions appropriately without trapping water inside the assembly. Removable toe-kick sections near machines can improve inspection and service. Avoid elaborate profiles that are difficult to wipe behind hoses or baskets.
At walls, doors, and floor drains, preserve movement and drainage requirements. A continuous bead of visible sealant is not automatically a waterproofing solution, and blocking a low point may redirect water toward an adjacent room. Coordinate perimeter behavior with the broader water strategy. After installation, inspect these edges under bright light and keep them accessible enough to notice discoloration or swelling early.
Use a Sample Area to Test Everyday Care
Before committing to a large order, assemble representative flooring, grout or seam treatment, transition, and base detail. Spill a small amount of diluted detergent or another approved test substance according to supplier guidance, clean it with the proposed method, and observe residue or sheen change. Place pale lint and dark thread on the sample to judge visibility. Test a damp shoe and typical basket wheel or foot. A sample cannot reproduce every condition, but it exposes whether the selected texture, color, and cleaning process suit the household better than a showroom display does. Include post-installation closeout in the flooring scope. Verify appliance level, threshold security, grout cure, seam bonding, perimeter details, and the absence of rocking or hollow damage where relevant. Record batch numbers and approved cleaners. Photograph the finished floor before machines and cabinets obscure it, then repeat after installation so any future movement can be compared against a baseline. Durable flooring depends on observation: a loose transition, cracked joint, or recurring damp edge is easier to repair when found early than after water has migrated beneath surrounding finishes. Establish a cleaning routine before the first detergent spill. Identify the vacuum head, mop, neutral cleaner, and spot treatment approved for the installed surface, then store them where they can be reached without dragging dirty equipment across folded laundry. Avoid assuming that a steam appliance, abrasive pad, strong degreaser, or excess water is safe merely because the finish appears hard. Follow manufacturer guidance for the floor and every grout, sealer, adhesive, or finish in the assembly. A modest material maintained correctly will usually outperform a premium surface exposed to incompatible products. Recheck high-traffic turns, the washer front edge, and transitions during the first year, when installation movement is most likely to become visible. Keep an undamaged flooring sample and installation diagram with household records. Mark concealed seams, heating sensors, drains, shutoffs, and difficult repair zones. If a leak or appliance replacement occurs, this information helps trades protect the assembly and select compatible materials instead of guessing beneath fixed cabinetry.


