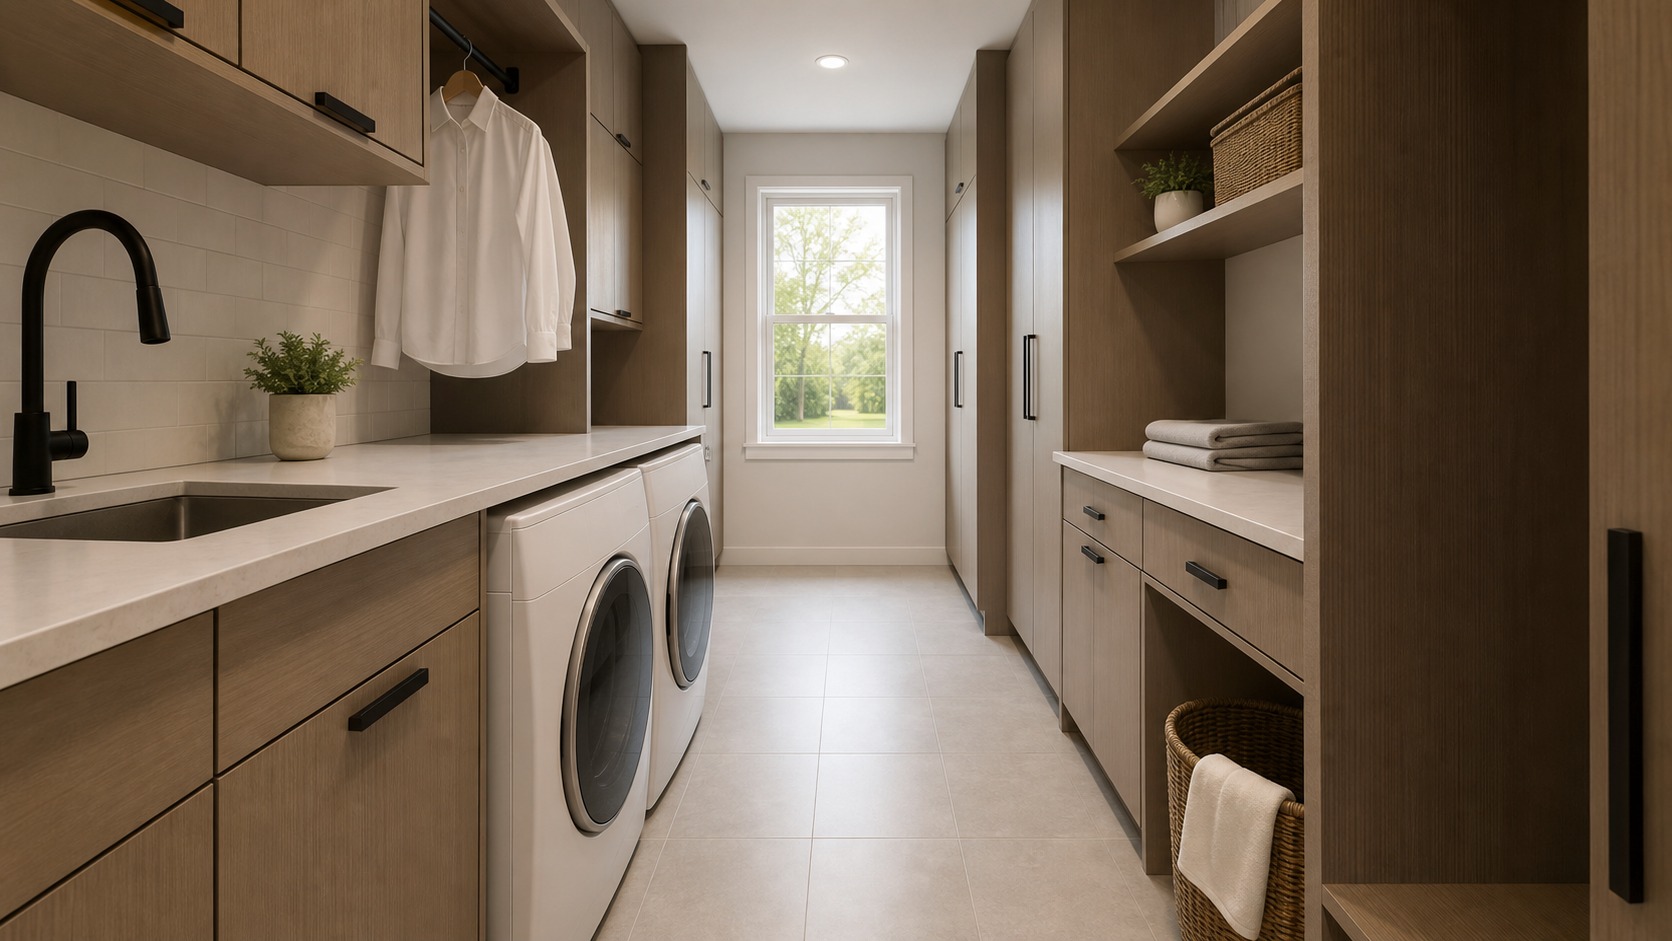
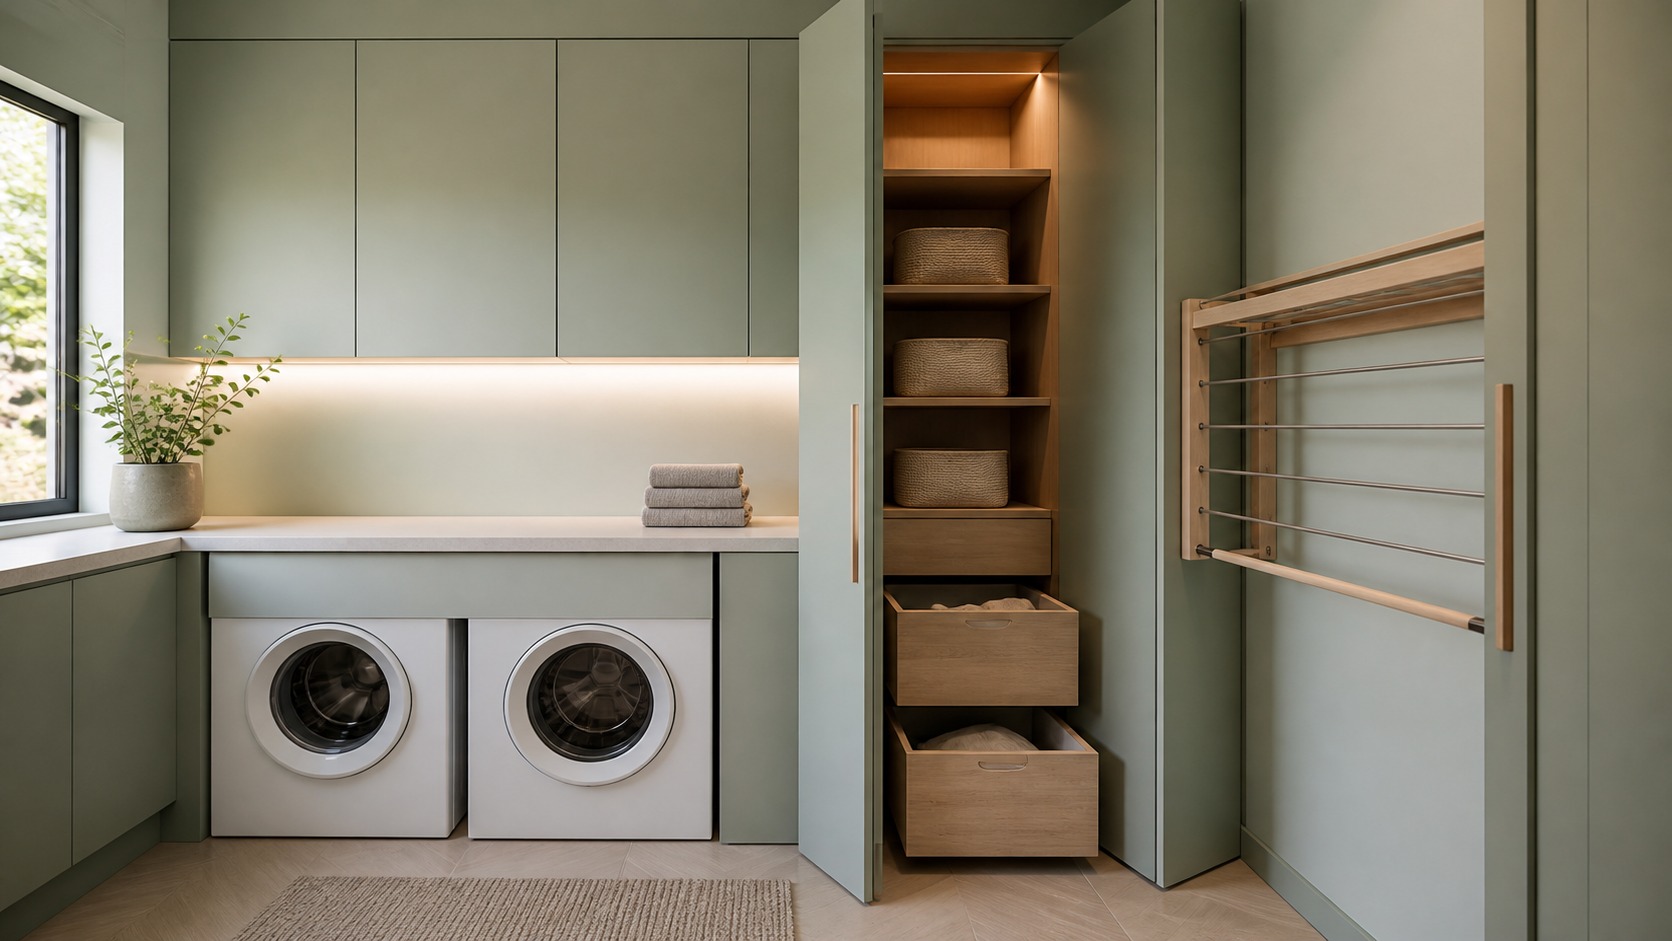
The Wall Can Change the Room Without Changing Its Footprint
Laundry room walls do more than carry color. They sit behind splashing sinks, vibrating machines, damp garments, storage hardware, and the visual clutter of utility connections. A thoughtful wall treatment can make an ordinary room feel architectural while improving wipeability, adding hanging capacity, or protecting a high-use zone. The quickest-looking transformation is not always the quickest project, however. Tile requires substrate preparation, paneling must accommodate moisture and outlets, and a rail or fold-down rack needs structural support. Even paint performs differently depending on sheen, ventilation, and wall condition. The best modern wall idea begins with the exposure each surface receives, then chooses a treatment whose maintenance fits the household. One room may benefit from a full-height washable finish; another needs only a durable sink backsplash and a strong storage strip. When material boundaries align with cabinets, windows, and appliances, the upgrade feels intentional rather than decorative.
A: Use a quality washable coating recommended for the room's humidity and follow its preparation guidance.
A: No. Tile is most valuable in splash and high-cleaning zones such as behind a utility sink.
A: Appropriate stable products can work when correctly finished, detailed, and kept away from uncontrolled dampness.
A: Test the full elevation and prioritize visible boundaries that avoid awkward cuts.
A: It may suit a dry, ventilated wall when the product and adhesive are approved for those conditions.
A: Consistent spacing, restrained trim, and alignment with architecture keep the texture controlled.
A: Heavy or moving loads need fastening selected for the wall assembly and the system's published requirements.
A: Terminate it at a cabinet, niche, corner, or purpose-made edge detail rather than an arbitrary point.
A: Avoid it where framing, plumbing, wiring, insulation, or rated assemblies cannot be safely altered.
A: Repair underlying conditions, apply durable paint, then improve the most visible or heavily exposed zone.
Read the Wall Before Selecting a Finish
Inspect for water stains, soft drywall, peeling paint, mildew, and previous patching. Cosmetic work should not cover an active leak, dryer-vent problem, or poorly controlled humidity. Resolve the source, replace damaged material appropriately, and allow the assembly to dry before installing a new finish.
Mark plumbing, electrical, studs, blocking, and appliance service zones. A beautiful paneled wall loses its advantage if valves become unreachable or a technician must cut through it. Photograph exposed framing during renovation and retain dimensions for future rails, shelves, and repairs.
Use Washable Paint as a Deliberate Material
Paint offers the broadest color choice and the simplest future refresh, but laundry walls need more than a fashionable swatch. Select a quality washable coating appropriate for interior humidity and follow the manufacturer’s preparation and curing guidance. A satin or comparable scrubbable finish often balances cleanability and glare, though product performance matters more than a generic sheen label.
Color can correct the room’s light. A north-facing space may benefit from a warm off-white, clay-tinted neutral, or softened green, while a bright room can carry cooler gray, blue, or deeper mineral tones. Test large samples beside cabinets and appliances at several times of day.
Use contrast to clarify architecture. A darker utility wall can visually contain machines and hookups, while surrounding walls remain light. Painting every small projection a different accent color usually fragments the room; one clearly defined plane is more convincing.
Protect the Sink Zone With Tile
A sink backsplash handles splashes, cleaning residue, and repeated wiping. Tile can be limited to this exposure instead of covering every wall. Run it to the underside of upper cabinets, align it with a niche, or terminate it at a natural cabinet edge so the boundary looks resolved. Choose grout and sealants suitable for the location, and keep transitions from trapping residue.
Choose Tile Scale for the Elevation
Small tile introduces many grout lines and a fine visual rhythm; large-format tile creates broader planes but demands a flatter substrate and careful cuts around outlets. Neither is automatically more modern. The appropriate scale relates to wall width, cabinet modules, and the amount of pattern elsewhere.
Lay out the wall before installation. Centering a field may produce awkward slivers at both ends, while starting from a visible cabinet edge may create a stronger composition. Confirm outlet and faucet locations against the proposed grid. A few inches of adjustment during planning can avoid small, conspicuous cuts.
Add Vertical Paneling for Height and Texture
Tongue-and-groove boards, narrow battens, or grooved sheet panels can make a low room feel taller and give plain walls controlled shadow. Use materials and finishes appropriate for interior humidity, seal vulnerable edges, and maintain required clearances from heat-producing equipment. Traditional profiles can still look modern when spacing is consistent and trim is restrained.
Paneling changes wall thickness. Extend electrical boxes correctly, plan casing transitions, and verify that appliance depth or door clearance will not be compromised. Avoid simply cutting panels around surface irregularities; a measured trim strategy creates cleaner results.
Consider where the treatment stops. Full-height paneling has a different character from a lower wainscot, and a partial height needs a cap that will not collect lint. Aligning the top with a counter, sill, or shelf can connect it to the room.
Bring Warmth Through Wood Without Ignoring Moisture
Wood slats or veneered panels can soften white appliances and hard tile. Use them on a relatively dry focal wall, select a stable product, and finish all exposed faces according to the supplier’s requirements. Maintain ventilation behind assemblies when the system calls for it.
A small wood section often has more impact than wrapping the room. Line the back of an open niche, define a folding station, or create a vertical panel beside stacked machines. Repeat the tone at a shelf or handle so the accent belongs to a larger material story.
Turn One Wall Into a Utility Spine
A coordinated rail can hold hangers, drying accessories, a removable caddy, or cleaning tools without scattering hooks across the wall. Plan its height from the objects hanging below and the users reaching above. Mount it to reliable structure and respect the rated load of every attachment.
Keep the system edited. A utility spine works when components slide, lift off for cleaning, and return to known positions. If every tool remains permanently exposed, the wall may look busier than a shallow cabinet. Reserve the rail for items whose access genuinely improves the routine.
Coordinate metal finish and geometry with nearby hardware, but prioritize grip, corrosion resistance, and replacement parts. A proprietary accessory system can be attractive; confirm that hooks and brackets will remain available before building the room around it.
Recess Function Where Wall Depth Allows
A shallow niche can hold stain-treatment supplies, folded cloths, or a compact drying rack while preserving counter depth. Recessing requires knowledge of framing, pipes, wiring, fire assemblies, insulation, and structural conditions. Never cut studs or shared building walls based on appearance alone.
Line the niche with a washable finish and design its lower surface to avoid pooling. Integrated lighting should use components suitable for the location and remain serviceable. A simple rectangular opening aligned with cabinetry usually looks more modern than a collection of small decorative niches.
Use Wallpaper Selectively and Realistically
Wallpaper can introduce pattern to a dry, well-ventilated laundry area, particularly above a counter or on a wall away from the sink. Confirm that the product, adhesive, and wall preparation suit the room’s conditions. Removable products still require a stable, clean surface and may not tolerate repeated humidity equally.
Choose pattern scale from viewing distance. A tiny motif can become visual static behind baskets and shelves, while an oversized pattern may lose its effect on a wall broken by cabinets. Order samples and view them with the room’s permanent materials.
Let wallpaper carry the expressive role and simplify nearby décor. Pattern plus busy shelving, signs, and multiple tile shapes can make a compact room feel crowded. One confident layer is usually enough.
Shape the Wall With Light
Wall-washing fixtures reveal color and texture, while under-shelf lighting improves treatment and folding tasks. Position light sources so panel grooves or tile relief create controlled shadow rather than harsh scallops. Glossy tile opposite a bright fixture may produce glare; test the relationship before final electrical work.
Keep wiring concealed but serviceable. Battery accessories can suit a modest retrofit, though they require charging or replacement and may not provide even task light. Hardwired work should be planned by qualified professionals and comply with applicable requirements around sinks and damp locations.
Resolve Edges, Corners, and Utility Interruptions
The quality of a wall upgrade is often visible at its boundaries. Decide how tile ends, how paneling meets baseboard, and how wallpaper turns an outside corner. Use purpose-made trim or a carefully detailed material edge rather than leaving installers to improvise.
Integrate hose boxes, outlets, vents, and shutoffs into the elevation without disguising their importance. Coordinated cover plates can reduce visual noise, but safety markings and access must remain intact. Paintable elements should be approved for painting; appliance connections should never be sealed behind a decorative surface.
Mock up complex transitions at full scale. A sample showing panel thickness, trim, counter splash, and cabinet side can reveal conflicts that individual product samples cannot. This modest step protects the finished wall from awkward offsets.
Upgrade the Most Visible Exposure First
When budget or time is limited, identify the wall seen from the doorway and the surfaces exposed to the most wear. Repair and paint the room correctly, then invest in one durable focal treatment: a tiled sink niche, a paneled appliance wall, or a structural utility rail. Repeating a small piece of that material elsewhere can make the intervention feel complete.
A successful laundry wall is easy to wipe, safe to mount into, and composed around the room’s fixed architecture. Its style comes from proportion and material honesty rather than a stack of decorative themes. By solving moisture, access, structure, and transitions first, even a limited wall project can change how the entire space feels and works.
Design for Future Repair, Not Permanent Perfection
Laundry walls conceal systems that will eventually need attention. Use removable access panels at valves, cleanouts, junctions, and other approved service points, and integrate them through alignment or matching finish rather than eliminating them. Tile backer, panel adhesive, and elaborate trim can turn a minor plumbing repair into broad demolition if access has not been considered. Keep spare finish materials, grout information, wallpaper batch details, and paint formulas with photographs of concealed services. Where an appliance wall may change in the future, a painted or modular section can be more adaptable than a highly specific inset sized to one machine pair. A modern room should age gracefully because it can be maintained, not because its working parts have been made unreachable.
Compare Project Effort With the Desired Effect
Paint and a carefully placed rail can often be completed with limited disruption, while tile, recessed niches, and full panel systems involve more trades and sequencing. Price substrate repair, outlet adjustments, trim work, and removal of existing finishes along with the visible material. An inexpensive tile can become a substantial project when the wall is uneven; premium paint may be the better value when preparation is straightforward.
Plan the order of work. Structural backing and electrical changes come before repaired substrate, tile or paneling precedes some cabinetry trim, and final paint touch-ups follow installation. Protect machines and ducts from construction dust, and maintain safe room ventilation when adhesives or coatings are used.
Judge the upgrade from normal standing locations, not only close to a sample board. A subtle wall texture may be more effective across the room than a complicated pattern, and one aligned utility feature may improve the elevation more than many decorative objects. The right level of intervention is the one that solves the wall’s exposure, supports the routine, and produces a finish the household is prepared to maintain. Record the final maintenance instructions as carefully as the color choices so cleaning products, replacement parts, and future repairs do not shorten the life of the new surface.